
Step 1:
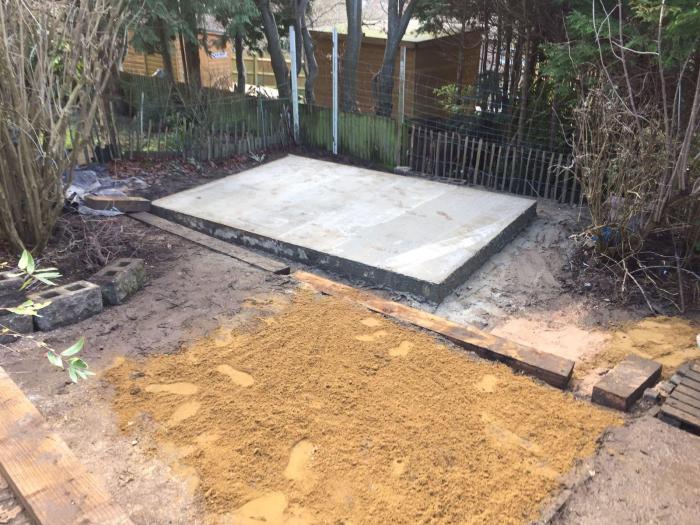
Prepare the site. In this case it required a fair amount of landscaping as the garden was on a steep slope. This is usually the most difficult, dirty and time consuming part of the project. We stepped levels into the land and built 2 patio areas around the foundations. This foundation is substantial at 9” depth with 12 road-pins embedded inside to 1.5 meters depth beneath surface and is total overkill for what it needs to support. It will not move or slip. A foundation must be perfectly level. Otherwise it will compromise the entire build.
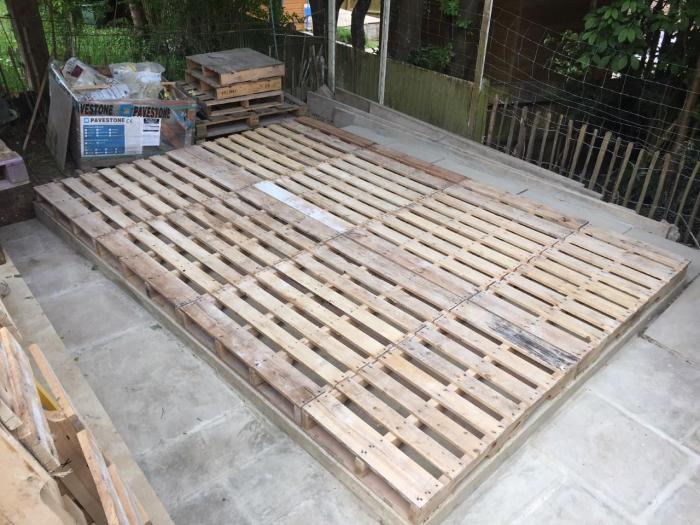
For this project I decided to use high quality American ‘Standard,’ pallets for the walls and the floor. These pallets are very cheap at £3 p unit. They are heavy and can be difficult to work with but you get a lot of material for your money. The rest of the build I have used conventional building materials. The pallets are completely hidden from view in the finished product so you never actually would know they were there.
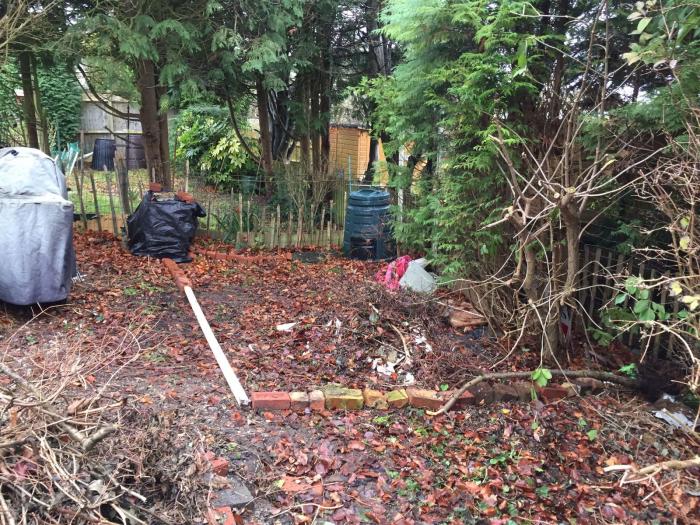
NOTE: Always think about where is the best place for your construction. How difficult it will be will largely depend on where you put it. It helps if you mark out the area to get an idea of what kind of space it will occupy once erected. Also consider your neighbours, inform them of your intentions and what you are doing or planning to build. It is always best to be on good terms with them and naturally people like to know what’s going on near to them. Leave a courteous gap between your building and the neighbouring border of at least 1meter. Try not to use power tools before 8am or after 6pm!
Step 2:
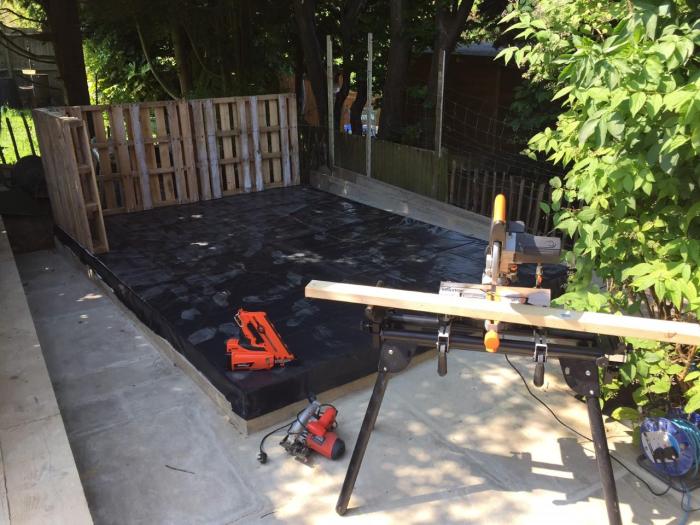
Build a near perfect rectangle from your pallets as a floor. These need to be mechanically fixed together.
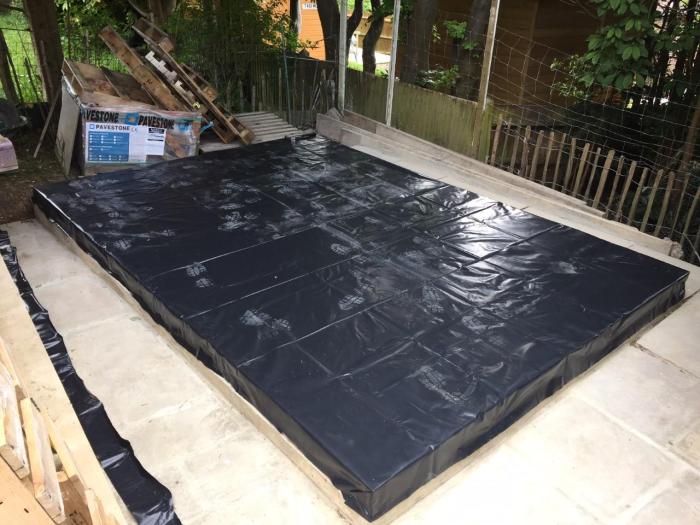
Step 3: Line this with impermeable DPM and staple tight to edges. No holes. This is to ensure no rising damp.
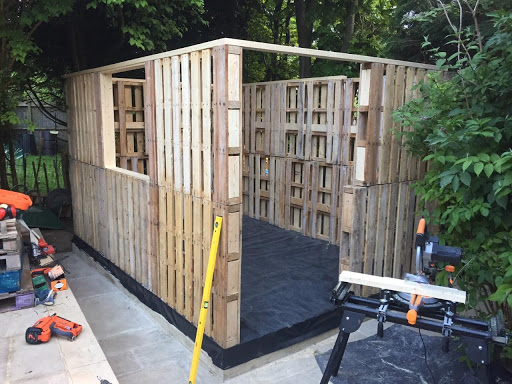
Step 4: Start assembling the Pallets. A nail gun really helps with this part, if you don’t have it use an impact driver. The walls must be square so use a long level. It helps if you make your base to the size of the pallets.
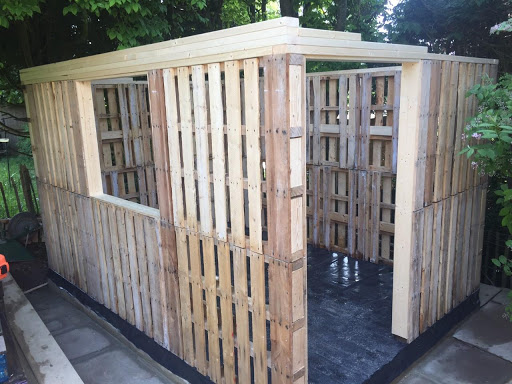
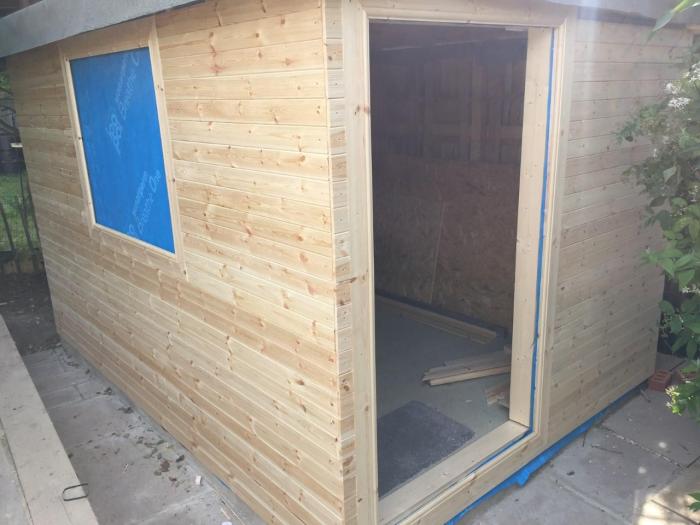
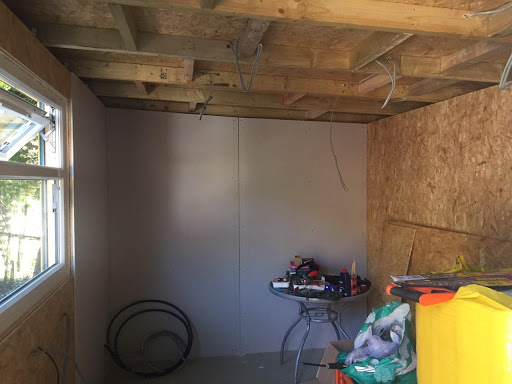
Step 5: Continue with your walls until you have the square, allowing for doors and windows. I used standard CLS for the top and sides. Make sure you correct as you go if you lose the square. It’s impossible to get your door and windows exactly perfect with pallets as they are not all the same size but try and get as near as possible as it will give you problems later if you have to correct overmuch for it. All the ends need to be sealed off so you have something hard to tap the outside cladding finish into. Line the windows and doors with lining. It goes without saying that this part requires a modicum of technical skill and experience.
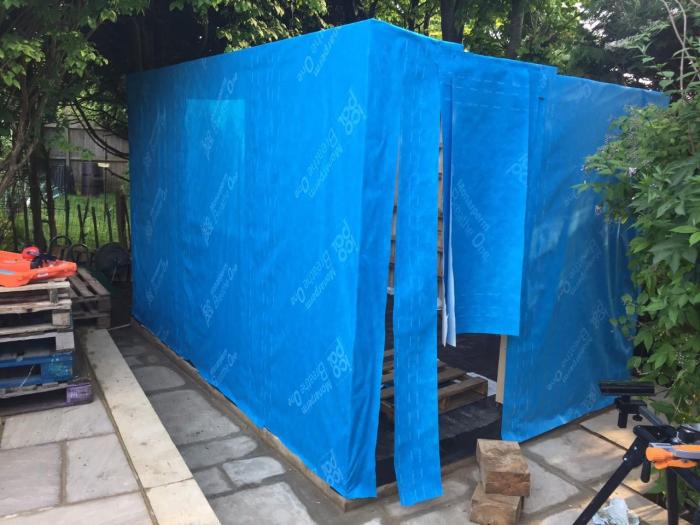
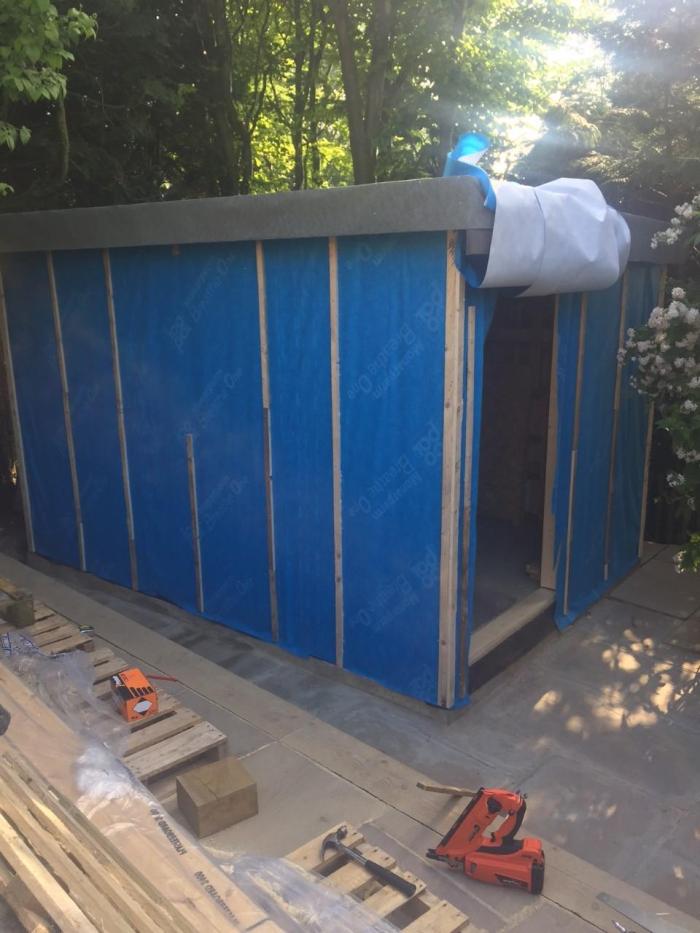
Step 6: Cover the building with a waterproof membrane. Lap over edges and staple tight so it doesn’t tear.
Step 7: Now get the roof on as soon as you are able! Affix roof joists every 400-600mm adding noggins. I used thick OSB for the roof but you could use something harder like floorboard if you wish. Cover with a layer of WPM then felt. These layers all need to be overlapped.

Your building should now be totally waterproof excepting any openings for doorways/ windows. I left my window sealed until later on and the doorway covered for this reason. Water is the enemy of a builder! Now you can put in the floor, I used waterproof grade floorboard, remember to leave a small expansion gap.
Step 8:
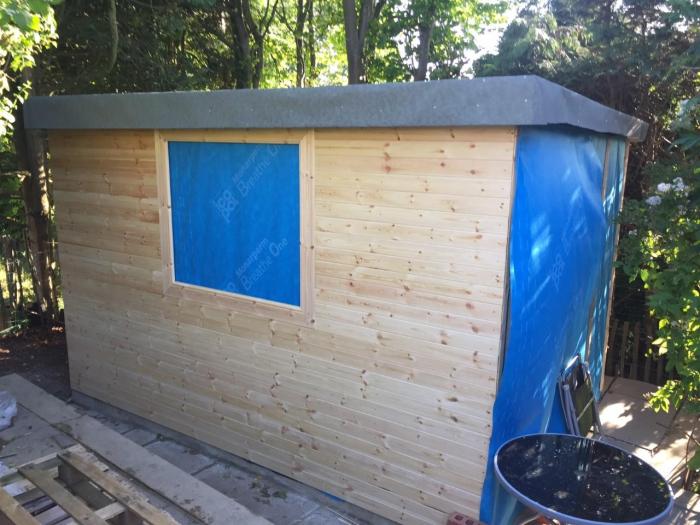
Baton outside every 400-600mm. I used the excess wood I stripped from spare pallets for the batons to save on materials. Make sure these are wide enough for error margin with the nailgun. I used a 30mm width.
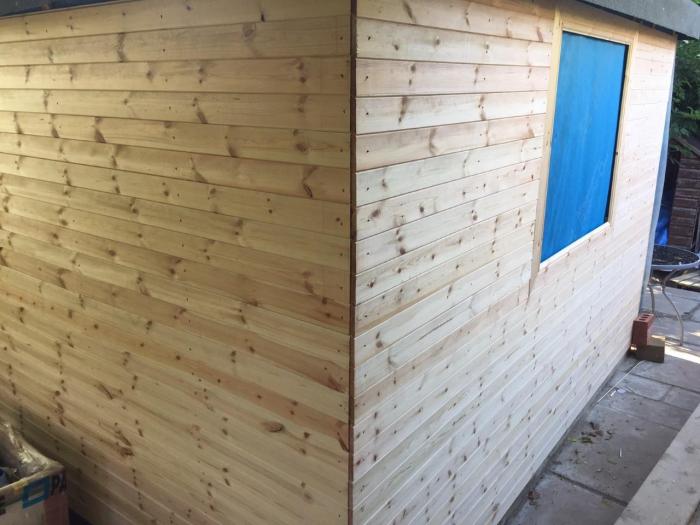
Step 9: The fun part, now you can add your outside finish. I went for T&G cladding which gives a smooth and beautiful finish. You could simply use a feather edge board which is 3 times cheaper. Line windows with whatever finish you desire. T&G is harder to work with as it can warp a little bit. Do not buy it or get it wet!
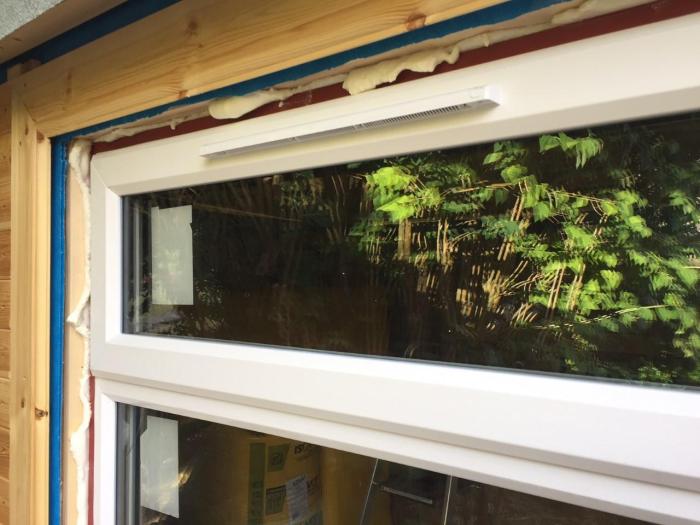
Step 10: Put in your windows and doors. I used the expanding spray foam for a perfect seal. It’s horrible to work with but gives a great finish. It’s surprisingly easy to get deflection in the doorway or over a big span if you mess this part up. This is a skilled job so if you’re not a tradesperson you should probably get a professional to fit them for you. However there are many tutorials online if you fancy giving it a crack. And it literally can end that way! Use a nylon hammer not a metal one.

If using spray foam. Let it go hard and then remove excess with a Stanley blade. Try to avoid getting it everywhere, it’s really horrible stuff. Check windows and door opens without any issues throughout. When it goes solid it will stay like that.
Step 11: Dig a 12-15 inch channel down the side of your garden and run 3 core cables, internet/ ethernet, TV cable down from your mains supply at the house. This is a job in itself but it is worth doing as you will want the facilities for your office/ study/studio or snug. Keep the cables together and protected in a 1.5inch wide plastic tubing. Tack and pin all the cables safely and neatly to your outside walls and always use a qualified electrician to do any work concerning connecting up to your mains. Do not attempt electrical installations yourself if you are not an electrician as you could kill yourself or could do work leading to wiring issues which can cause fires. This is the only part of the job I used another tradesman for other than the plastering which I also outsourced. I don’t get involved in Electrics, Plumping or Plastering!
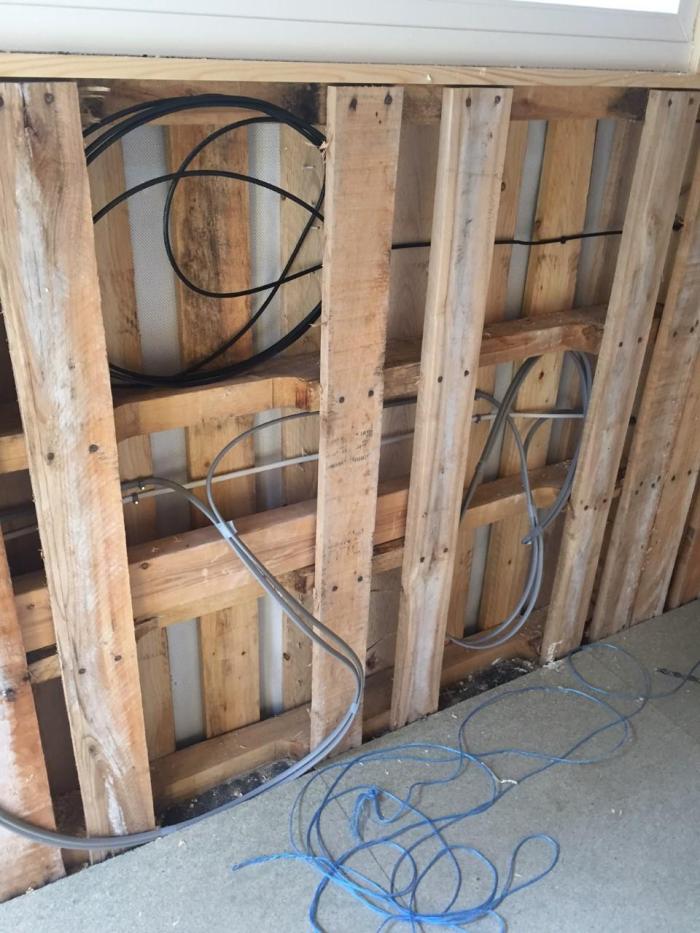
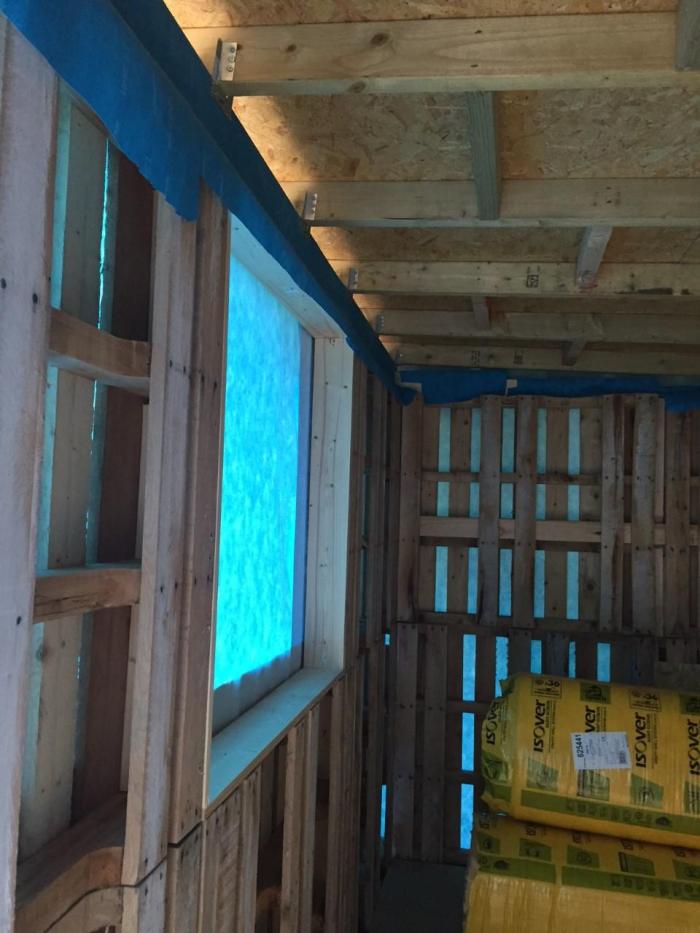
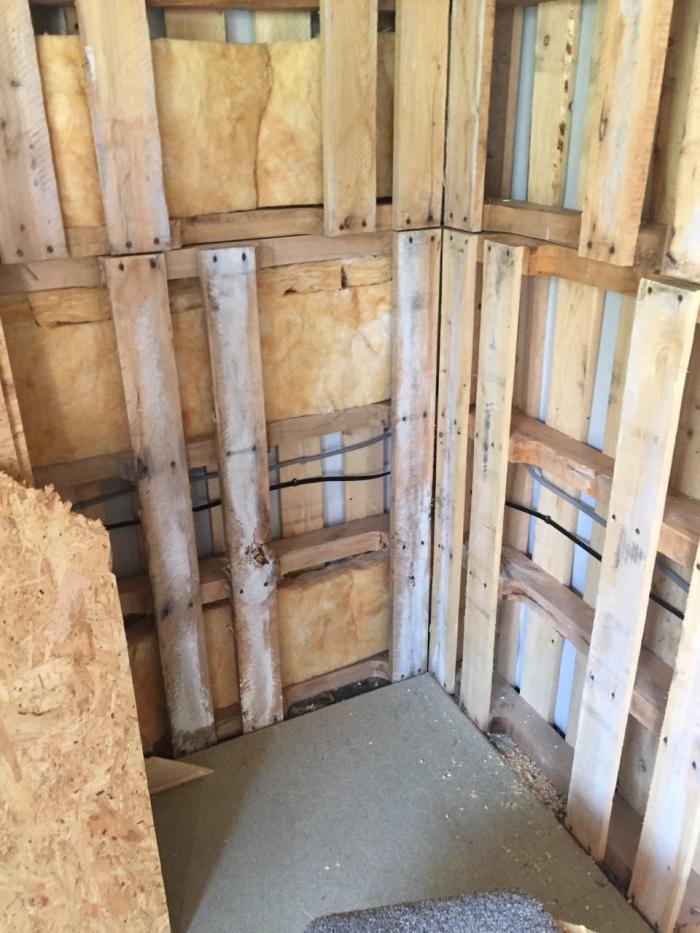
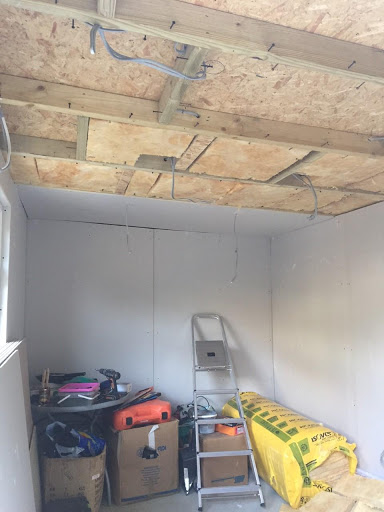
Step 12: First fix electrics. After threading your wiring to the outside walls of the pallets. One of the benefits of pallet construction is that they have easy access for cabling and insulation. If you are building with conventional materials (CLS most likely) the insulation stage would be a bit quicker in labour time as the measurements would all be uniform, but the cabling would take you slightly longer as you would need to drill holes for the cables. You can insulate with either Celotex (The hard stuff with foil on the sides) or the cheaper flexible roll insulation you see below. This construction had so many layers that I was not at all concerned with its thermal insulation factor so I used the roll type. Whatever you use, always wear a mask and protective clothing as the particles are very bad for your lungs and irritate the skin and eyes.
Step 13: Board out your walls to your own specifications. I used OSB behind plasterboard. You could simply use plasterboard but I wanted to be able to hang heavy objects on the wall to save space. Take pictures and draw pencil marks on the plasterboard where all the wires are so you don’t hit any by mistake. Use an impact driver on a low torque setting and plasterboard screws. Avoid punching right through it, just snug! Remember to thread all your wires/ switches and light points through very carefully and leave ample room for the electrician to move them around. Do not cross any of the wires over each other as this can create a small magnetic field that is sub-optimal for the performance of their electrical conductivity. Leave gaps around the lights so they don’t overheat. I used ultra-low energy LED spot lights but still left a 10cm gap.
Step 14: Plaster the room. Use a professional, plastering is an art! Leave alone for 5-7 days, no heating.

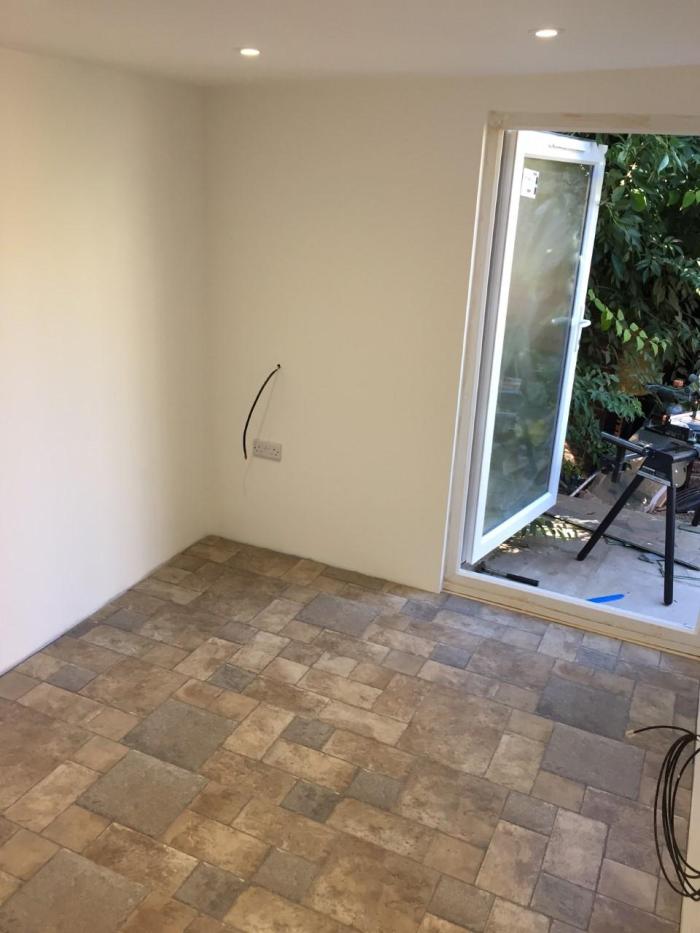
Step 15: Second fix the electrics, which normally means the final stage. You now have power sockets, light and depending on what else you put in internet and TV. This means for the few final stages of the build you can work in the warmth like a normal person! Then you can paint and put on the final fixtures. Use masking tape around the edges of things you don’t want painted. Use a water base then 2 more coats. Be patient, don’t rush this phase. Use good quality paintbrushes/ rollers which can be cleaned up and reused.
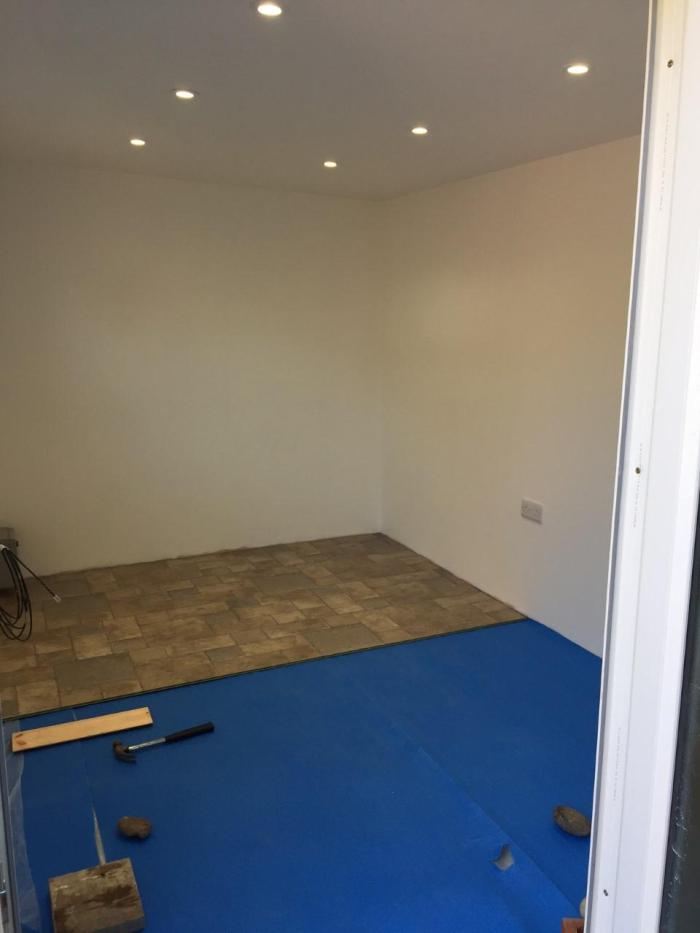
Step 16: Now you can lay the floor. I used simple laminate flooring with quality underlay. The underlay is more important than the flooring itself for insulation and noise reduction. Flooring is another skilled task, be patient and precise. Remember to leave an expansion gap around the edges. Measure twice, cut once!
Step 17: Affix skirting boards and clean up any loose ends on your snagging list. Then you are pretty much done on the inside.

Step 18: Protect the outside of your building with whatever finish you desire. I used a decking oil based protection that nourishes and protects the wood from weathering. This part is unfortunately very tedious and time consuming but it needs to be done. Minimum 3 coats. There are however many other products out there which require fewer coats, even single coats. But I wanted to leave the wood colour for this project. After the first 2 coats, attach the cornering pieces the edges of the building to hide the rough cut edges. I glued them with wood adhesive. Make sure you wipe off any excess glue. Then added 1-2 more coats.

Step 19: Test your internet connection/ TV cable, furnish with whatever you wanted in there. Then it’s time to crack open a beer and give yourself a pat on the back! You can start enjoying your space.
